Tuesday, March 31, 2015

The Hunt 2

hi all,

I finally had time to continue work on this piece.

As mentioned previously, I decided to apply the skin effect.
 
It's a lot of work, but it is rather meditative and it is worth every second.
Once I had the first leg done and baked, I started to flesh-up the rest of the body - note I also added the front legs, which I initially forgot ;D
 
With the Huntress on it.


Then the fleshed-up tail.
 
and the first base for the head
Since I can't get the whole piece into the oven, I decided to cut off the head as well as the tail.
This also makes it easier on applying the skin effect.
There are some areas that are really hard to reach with the stamp
But now the body is baked (Note the one arm broke off in the oven, so he's in a sling till the glue settles)
 
Next I can start doing the head :)
Cheers
Klaus

Tuesday, March 24, 2015

The Hunt (1)

Hi all,

so here's my new project - The Hunt.
The idea was actually inspired by a song.
It's from "Two Steps from Hell" and called "Strength of a Thousand Men" - https://www.youtube.com/watch?v=N2RK6OGNMCY
The actual scene I want to build has nothing to do with the song, but the fast pace, the epic chorus is the proper setting for my scene.
The Hunt is to show a female riding a fast paced raptor-style dragon, while hunting a "beast" with the spear. Since such a dragon is rather big, I decided to use a smaller scale for the model than I did for "The Princess" (scale on the right).
Once I drew up the scale using the 7 1/2 head anatomic scheme I started to create the wire armature.
 
And then bent it into the shape I have in mind.
 
Again I used ProCreate to connect the individual wire sections and get everything in shape.
 
Then it was time to look into the dragon.
As mentioned I want it to be a fast riding beast more along the lines of a Raptor than a T-Rex.
So the University of Google provided me with a lot of nice options.
 
I started to build the basic armature from wrapped aluminium foil.
 
For the legs this later proved a mistake....
 
Once pleased with the basic armatures I started to add mass to the "girl" using SuperSculpey "firm"
 
 
Looks a bit "mature content"....
 
But on the dragon it's a totally different story ;)
 
While I pre-baked the female shape (using a heat lamp) I started to sculpt the legs of the dragon.
 
Then switching back to the girl I added her upper torso and arms.
 
Using a compass(?) to transfer the basic measurements.
I continued adding mass to the dragon.
And once the grey underworks for the girl were baked I started to add the first muscles and skin to her, using SuperSculpey standard.
 
The two together...
 
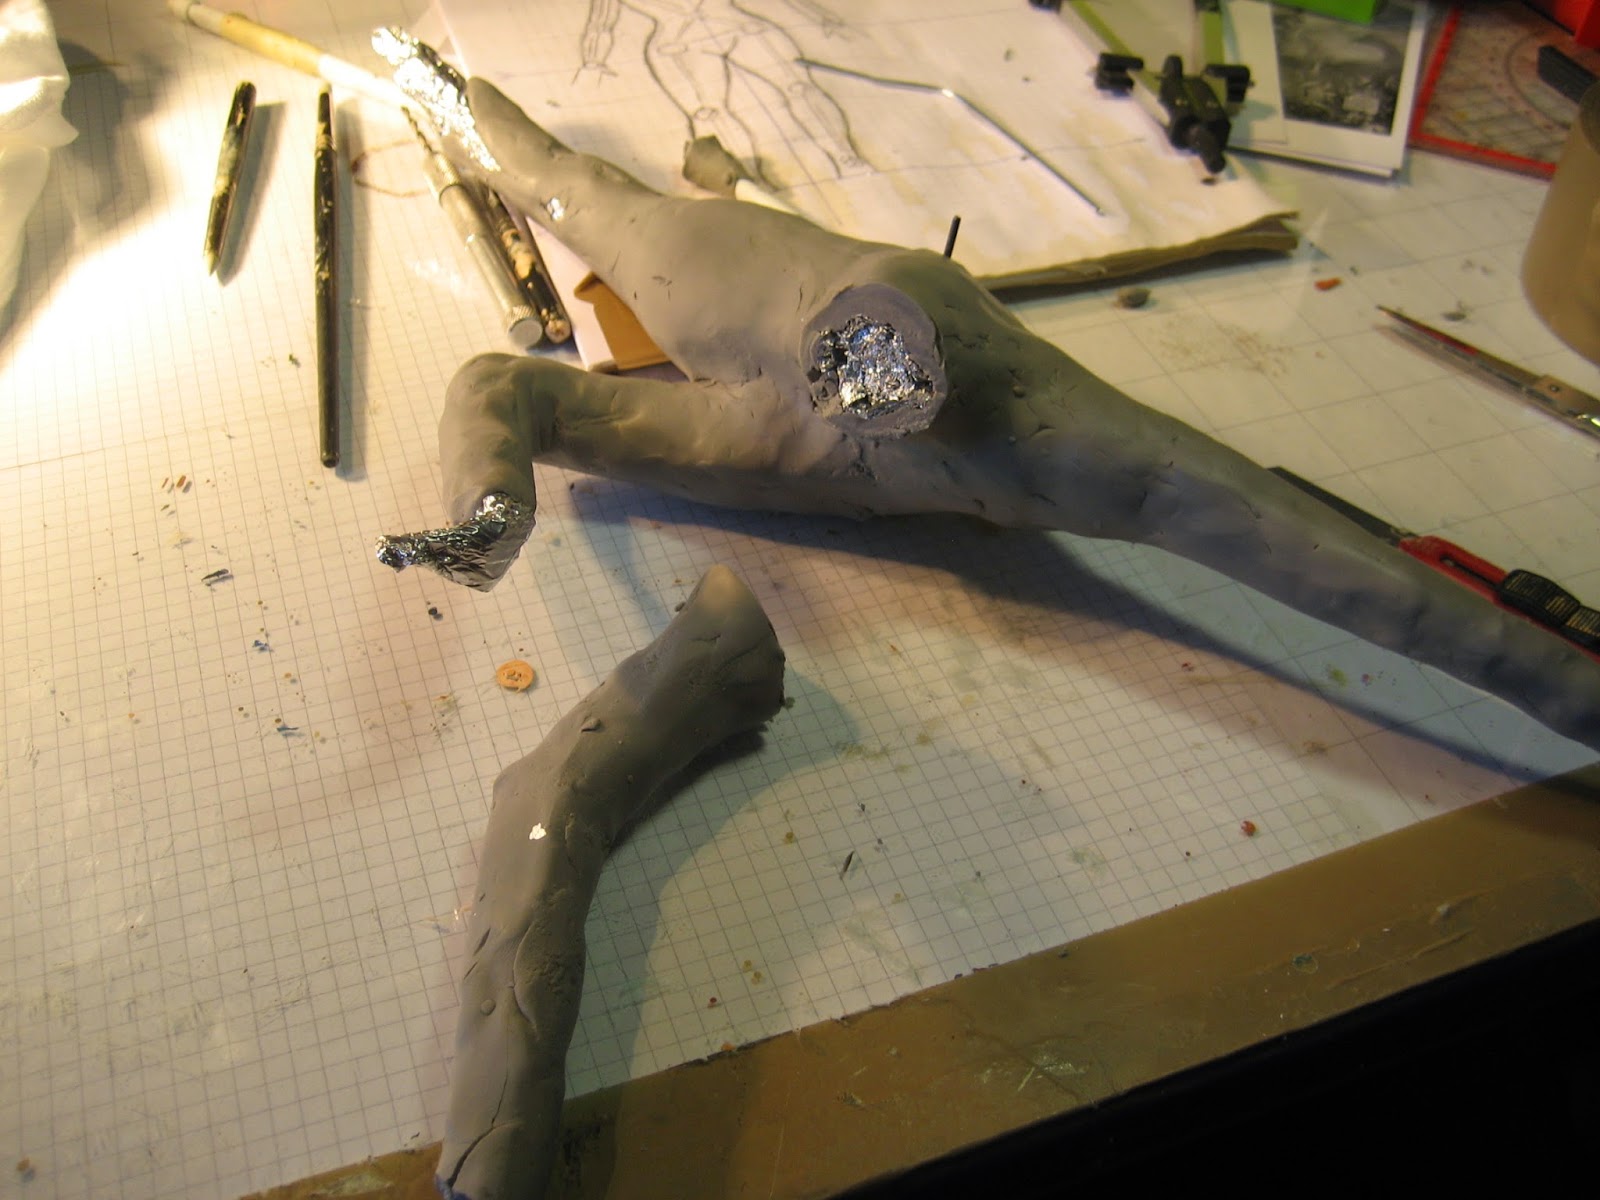
While this looks nice, the main leg couldn't support the weight.
So I chopped it off.
 
and gave it a new, sturdier base, using a cloth wire hanger.
Jurassic prosthetic leg :)
 
This looks now a lot better :)
 
It looked so much better, that I decided to also re-work the other leg.
 
And while these pieces cured I continued with the girl.
 
The dragon now supports his own weight in the running pose.
 
Since my wife was complaining about the smell in our oven after baking the SuperSculpey, I decided to build my own curing oven.
I used an old metal trash bin, some stone tiles, a lot of aluminium foil and my old, very hot light bulb lamp.
 
It worked like a charm - takes longer than the real oven, but I don't have to worry about the smell and cleaning the family oven.

For the remaining sculpting process I decided to add another support to the dragons body - kind of impaling the beast - but this will be removed after the body sculpting.
 
Well, this is as far as I got since March 20th.
So what do you think?
Cheers
Klaus

Tuesday, March 17, 2015

The Princess - Final

Hi all,
thank you for your support, comments, feedback and suggestions!

With your help "The Princess" is now finally completed!
Here is the image for Cool Mini or Not
http://www.coolminiornot.com/376007


And some more quality images with proper lights and background.
I hope you like them :)


 I have the next project already lined up, but since I want to participate in the Scale Model Addict Spring Contest - 
http://www.scalemodeladdict.com/SMF/index.php/topic,12049.msg183381.html#msg183381
But I can't start before March 21 - so a short break is allowed :)

I have also decided to give away most of my uncompleted projects for free!
If you're interested:
http://www.dakkadakka.com/dakkaforum/posts/list/640187.page#7675806

Maybe you can give one of the projects a new home and complete it?
I'd be more than happy.
Cheers
Klaus (probably Santa after all ;) )

Thursday, March 12, 2015

The Princess (9)

Hi all,
Thank you for your positive feedback!
A very special thanks to Joe B. for linking back to me :)

Since the last update I added some final patterns to the Princess' clothes - well actually the bands on her crown and the longer ones over her shoulder.
 
And then I spent several day shading and highlighting the skin.
 
Last night I finally did the last highlights to her gold.
 
And now I want to call her complete :)
 
I will leave her alone tonight, and then look at her to see if anything is missing.
There are some touch ups and cleanup to do, but other than that...
 

So what do you think?
Did I miss anything?

And a final comparison shot unpainted to finished :)
 
Thank you all for accompanying me on this great journey!
It was a lot of fun.
I already have an idea for the next project - kind of related :) - but I will pause a week or so...
But first I have to do the cleanup and touch up, then some good photos.
Thanks again!
Klaus