Wednesday, February 26, 2014

Pollux and Castor (5)

Hi all,

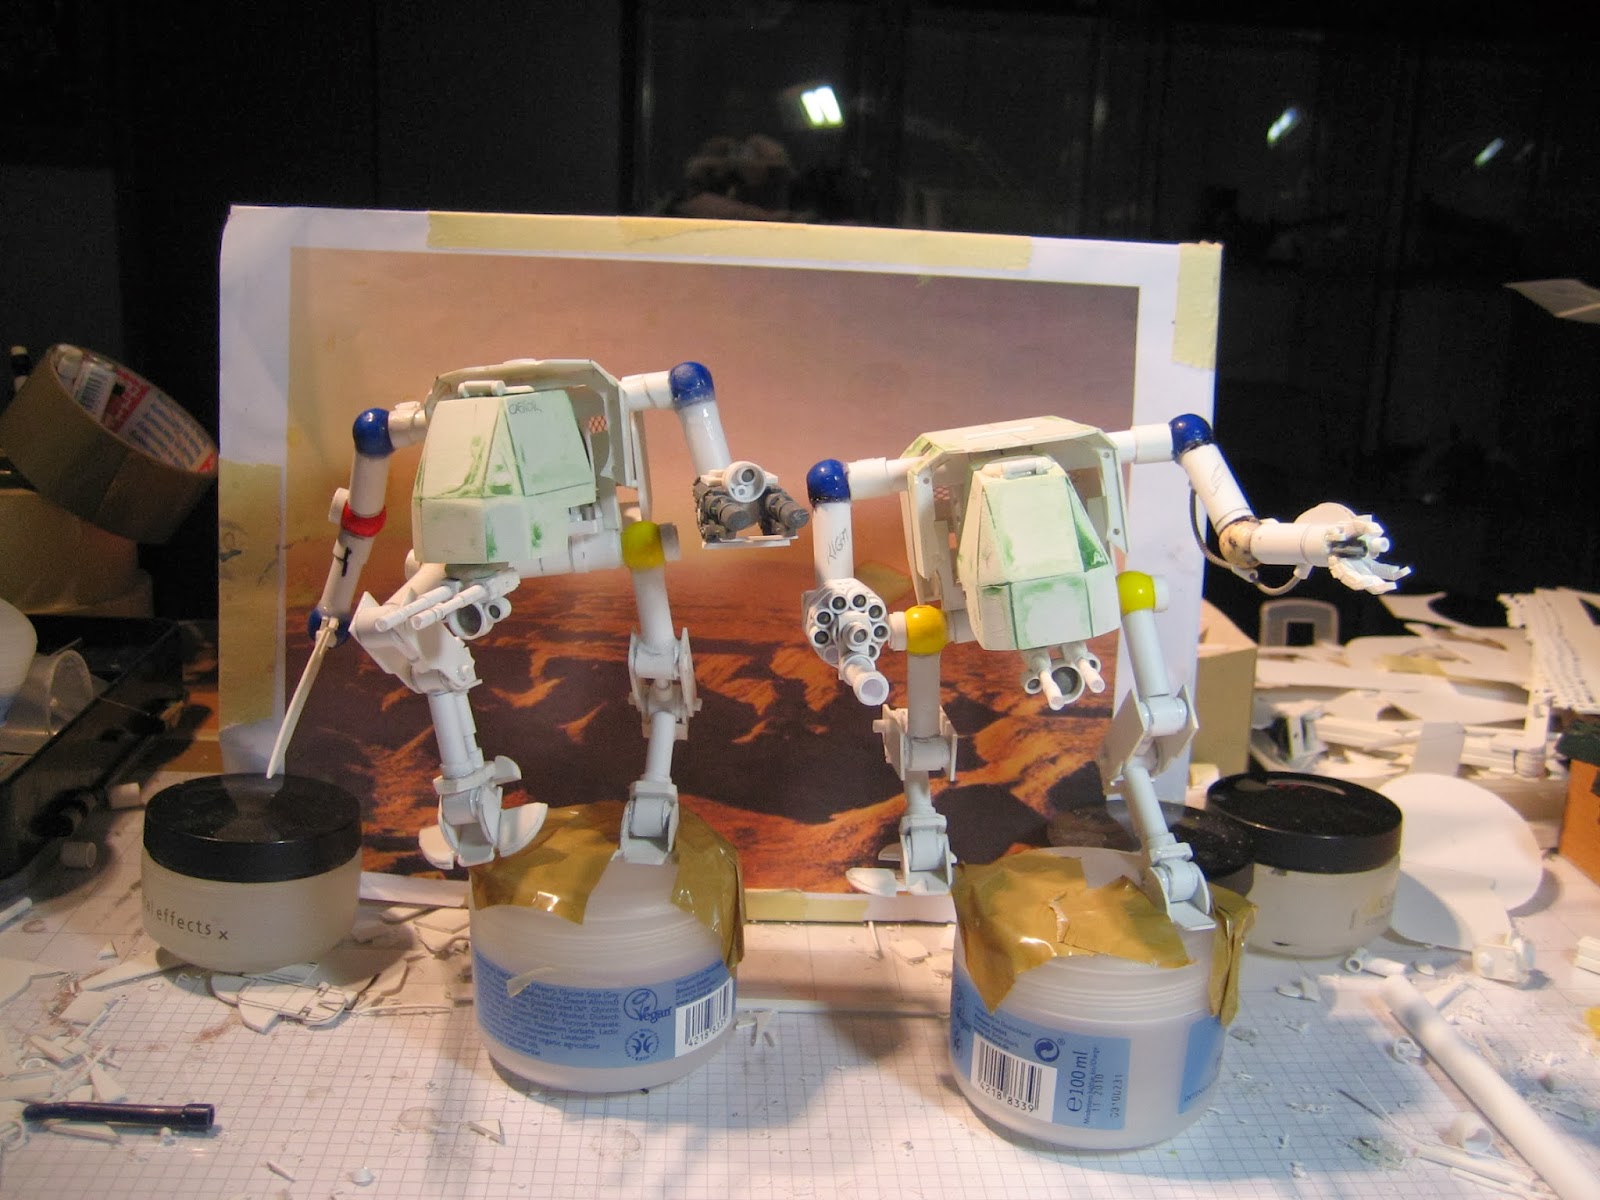
Now that the actual build of POLLUX and CASTOR is completed (well maybe I will do some additional armor around the "armpits" ), I started with the diorama base.

Here you can see the two walkers/knights on the board. The lines show where the sewer will be and where the opposing gun will be.
I'm using my standard instant plaster for the base, as this will crack nicely.
The soda cap is the hole for the sewer manhole.
 
While the plaster cured I started to assemble the Ork crew.
The gunner will be turning in his seat to look at the new approaching danger...
 
The plaster cured nicely with some great cracks :)
 
The gun itself is a big energy beam weapon - not really a Zzap gun, is it?
 
 
And the gunner turning in his seat to look at the approaching walkers.
 
The mount of the gun, with rivets and cables.
 
 
And the two Orks that do the turning of the gun :D
 
 
On the base.
 
Ixajin asked how tall they are.
Shoulder height is between 12 and 13 cm (depending on pose)
 
With the basic gun built I started to cast a lot of bricks, using my Hirst Arts molds.

The basic street layout with the sewer manhole.
 
Oh, and here is the RPG gunner :)
 
As you can see he's hit as he's firing his RPG...
 
I wonder what it will do to his rocket.... :)

The buildings nearing completion.


After the buildings were built I drew the ornaments for the street.
 
And carved the lines into the plaster...
 
 
Most of it will be covered by rubble, so I really wonder why I bother :P
 
 
The one window behind the gun will have a mural.
 
But most of the glass will be shot.
 
The other window is boarded up.
 
So, what do you think?
I look forward to your feedback and suggestions.
Cheers
Klaus

Monday, February 17, 2014

Pollux and Castor (4)

Again great feedback here and in the other forums!
Thanks allot mates :)

Now that most decisions are done, the basic skeleton build complete, I was able to look at the actual "beefing up" and adding armor.
For this I wanted to keep the 3-sided (or 6-corner) approach that I also used on the carapace.
 
The first section of armor plates on the thigh of POLLUX.
 
And on both walkers (they now look a bit like Dutch Ice Skaters :) )
 
 
The first armor plates for the shins.
 
Here you can see clearly the difference with and without shin armor.
 
 
While the Green Putty cured I added a shield to CASTOR.
The putty sanded and cleaned up.
As a final detail I added a plastic card ornament to the shield.
And then it was time for rivets - plenty of rivets :)
And POLLUX with rivets - did I tell you how much I like his pose?
 
No, I LOVE the pose :)
 
POLLUX and CASTOR completed!
 
So, what do you think?
Do they look Imperial enough?

Now I will start to look into the other combatants and the actual construction of the street and buildings. So I will browse the Hirst Arts gallery (http://www.hirstarts.com/projects.html) for some inspiration.
As opposing combatants we'll have some Orks. I have the idea of an Ork emerging from a sewer manhole and firing an RPG-style rocket launcher, but I still need a bigger opponent, worthy of POLLUX or CASTOR.
Maybe a tank or a emplaced gun (no walker, as I've already done some Ork walkers :) )

I look forward to your C&C and suggestions.
Cheers
Klaus

Thursday, February 13, 2014

Pollux and Castor (3)

Hi all,
thanks for your great feedback.

I read several comments about the roundness, lankiness, tube-style of the extremities. 
Apparently I missed to mention that these are just the bones, the skeleton. As soon as I'm done with the basic build, tubes and hoses I will add armor plates.
This will bulk up the features and add the imperial box style.

Actually I was intending to give the two Knights a face like feature with the lights, but it seems that's not well appreciated with you :)
So I will try something different (though no final decision yet).
Some of your feedback suggested to try a lights-MG combo for the chin.
So this is what I tried yesterday. Its a twin mount for the MG and the central light, accompanied by two sensor lenses left and right.
 
Looks pretty good.
Today's question is to mount them to the front or rear of the chin.
Version A (rear)
 
Version B (front)
So what do you think?
 
So is this central chin version better than the other "facial" versions?
If so, which one is better - front of the chin or further back?
Thanks I look forward to your C&C and suggestions.
Cheers

Klaus

Wednesday, February 12, 2014

Pollux and Castor (2)

Good morning!
During the initial design phase I planned to add some Machine Guns/Stubbers to the cockpit/head.
So I quickly built 4 MG.
However, when mounting them I wasn't really convinced.
 
What do you think? Too much?
 
Or maybe an alternative position?
 
Would the MG further back on the side or even under the chin look better?
Or should I remove them completely?
 
I recall someone asking me what kind of balls I use for the joints.
They are pretty no-name wooden beads 12mm - I got them in a local hobby store.
 
After I put the MG to the side to see what your feedback will point me to, I began to work on the ranged weapons.
I decided to give CASTOR some twin-linked Lascannons. 
 
A rather simple mount, with an extra central sight.
 
POLLUX' multi-purpose power fist with the flame-thrower also received a small belt fed bolter.
 
Truly multi-purpose :)
For his right side he's getting something bigger.
It is a special low-velocity drum fed Grenade Launcher.
With its 9-shot magazine it can dish out some devastating fire. The 80mm grenades with High Explosive warheads have a large blast radius and are excellent anti-personnel weapons - speak Ork Splatterer :)
Before I will apply armor to the arms and legs I started to add cables and hydraulic hoses.
And here's the final question for you :)
I want to add lights - like I used on the PONOS and POLEMOS.
Which version looks best?
Version A
 
Version B
 
Version C
 
Version D
 
Version E
 
So what do you think?
I look forward to your feedback on the machine-guns and on the lights.
Thanks

Klaus