Since I was quite satisfied with the basic hull, I started to dig through my bits box in search for wheels.
Some old Tamiya roadwheels from a 1:35 Hanomag and the drive sprocket from a Sherman, as well as some road wheels from a PzIV will make up the wheels for the HERC.

After I was pleased with the wheel arrangement I designed the outside of the tracks - the skirts?

And this is how it will look.

Next I mounted some spacers (2.3mm)


And after about an hour I had them all completed.

So I immediately mounted the wheels - patience is not one of my virtues :-P

Once the wheels were cured I also mounted the skirts.


And then competed the other side.


Then it was time to design the actual tracks.

I had a pretty good idea of what I wanted.


Here you can see them in comparison to the ZEUS' tracks.

With a bit of sanding and smoothening they worked like a charm.

So I added some details.

And this is how they will look on the HERCULES.
Obviously I won't build 50-80 of these manually.
So time to get out the molding kit.
So time to get out the molding kit.

Of course you can also use Lego - may be way cheaper too - but you have to always make sure you seal everything off.
Here I used ordinary kids clay.
Not the cheapest, but IMHO the best when it comes to usability.

Simply mix it 1:1

Give it a minute to release all the air bubbles

And start applying a thin coat on the details,

and then pour everything into the casing.

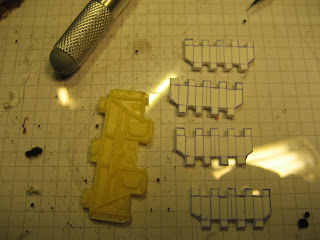
After about 30 Minutes its cured. Here you can see that a little bit of silicone crawled beneath the track pieces.

So there will a bit of cleanup to do.

But actually it was a lot less than I anticipated.
Again, my tried and true 1:1 mix from Rai-Ro.
For just these 4 tracks there is very little resin you need at a time, so there's considerable spare...

After an hour the resin is cured enough that you can release it from the mold.
Some air bubbles, but SWEET :)
So I created an hatch, a vision plate, and a sight.
This time I don't want to use my silicone for the mold, but rather the new InstantMold from Cool Mini Or Not.


