Monday, July 22, 2013

ATHENA - Steampunk airship (95)

As written in the last post, I'm not so sure about the final position of the two CIWS', so I decided to finally go for the 4 engines and rotors on the short stubby central wings.
A while back, I had build 1 engine that I tried to duplicate via casting.
Unfortunately I had quite some issues with it, and I finally gave up casting the 4 engines. Pondering what else to do, I remembered the CHARON's rotors and decided to give it a try.
For this I cut 8 disks out of an A4 sheet of PC and then out of these another disk.
Out of the cut disks I cut the actual rotor blades. For this I drew the lines on a sheet of paper and then it was relatively easy to draw these lines on the PC disk.
 

Next step was to cut the actual blades and round them off nicely.
 
Then they were mounted onto a central axle.
 
The rotor was then glued onto one of the outer rings.
 
 
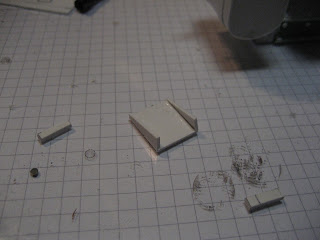
Then some spacers (about 2cm high) glued to the lower of the two rings.
Please also note the larger spacer on the left, that already has the axle to mount the engine glued in place.
 
Then I glued the upper ring in position, and wrapped it with .5mm plastic card.
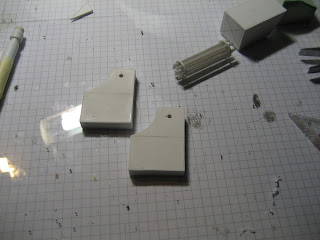
Then I had to drill a hole into the stubby wing and rudder.

Into which I can now mount the engine-rotor combo
 
The combo is rotatable, so it can be used for lift as well as propulsion.
 
 
I think it looks rather good on the ATHENA, don't you think?

Cheers
Klaus

Thursday, July 18, 2013

ATHENA - Steampunk airship (94)

After the last little disaster I rebuild the ammo drum, now in the proper width :)


And while the PC around the drum cured I added rivets and ornaments to the rest of the gun.


Next up was the ammo feed. For this I cut a 1cm wide strip of 0.5mm PC and wrapped it around a pencil (to give it a round shape)


For the "ammo" I cut 3mm wide stips of 1.5mm thic PC


I glued these onto the strip with slight gaps between them.


Once the ammo drum was cured, I added two small stips of .25 PC for the ornaments.


When the ornament strips cured I finally mounted the drum to the main axle.


One thing I realized is that the axle I used this time was rather thin (compared to the rod in the original gun) and it has a tendency to bend....

While the drum cured on the axle I prepared the connection to the ammo feed.


In between these steps is always time for some rivets :)


Another needed ornament is the Fleur-de-lys for the front of the ammo drum.


Finally I mounted the ammo feed to the gun body and the ammo drum.


And with this the NEMESIS twins are completed :)


Yeehah!


But I'm not 100% happy with the position on the deck....


I will have to wait until I have the 4 manouver engines and rotors on the central stubby wings before I can decide where I will position those two babies.
I hope you enjoyed this little build :)
Cheers

Klaus

Wednesday, July 17, 2013

ATHENA - Steampunk Airship (93)

The weather outside is beautiful and time is fleeting... :)
But I still got some hobby time.
First I used my Secret Weapon, the .25mm Plastic Card to do the ammo drum


While the first section cured, I started detailing the sights box.


As these little pieces set, I started to wrap the plastic card around the ammo drum housing.


I also used the .25mm card for this little sight.


glued in place it looks rather cool.


With rivets and details the sights box looks nice, but it is quite considerably slimmer than the original.


The next item on my agenda was the ventilation grill on the rear of the gun mount.
For this I cut some strips of (you guessed it!) .25mm card...


And carefully glued them on top of each other, slightly overlapping.


Its quite a task to keep them aligned and spaced properly.


But with the little frame around it, it looks great :)


Some more details on the gun top,


and I was able to glue the gun to the central axle.


Nice :)

Due to my unique, unrivaled and superior calculation skills, I was able to....
...well...


...create a rather thin and flimsy ammo drum! :(
Crap on toast.
Aaargh!


I don't know what I calculated, but the drum is a good 1cm to small.
So I ripped the plastic card back off.


The mistake was that I used 1cm wide spacers instead of 1.5cm wide one. Somehow I calculated with the sections I'd need 3 spacers...
Haha, I only have 2 spacers.

So you see - I AM NOT SANTA :)

Well, I hope I can wrap this NEMESIS CIWS up by the end of the week.
Cheers
Klaus

Monday, July 15, 2013

ATHENA - Steampunk airship (92)

I had a pretty busy weekend with lots of good weather, family and friends.
So hobby time was relatively limited.
But I got to work on the CIWS a bit more.

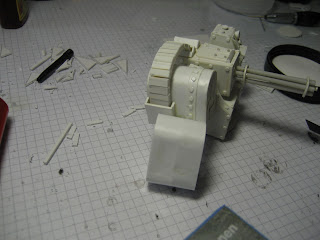
First I completed the main turret body - I had to do some gap filling and sanding.


Next I drilled the holes for the main gun axle.


and then I was able to glue the two sides in place.


The gun body fits nicely and elevation and depression is like on the original NEMESIS.


Once this was verified I mounted the barrels to the gun body and started with the sights box.


 I'm not sure if the weather was too hot for me, but when building the sights housing I created some rather big gaps, so I had to fill and sand a lot...


While the putty cured I started with the ammo drum.
Using the marked disk as scale again, I drew the 3 sections onto the plastic card.


When cutting such rather "delicate" shapes I tend to keep the main section still attached to the plastic card (cutting the curves first).


The three sections look rather good, but they are not really identical.


For this purpose I tape them together (ensuring they are aligned perfectly) and then sand them together to the same exact shape.


Once I was satisfied with the shape, I glued them together, separated by 1cm strips of plastic card.


While the basic shape for the ammo drum now cured, I sanded down the sights box.
This NEMESIS will be a mirrored model, so the sides for the sights and ammo drum will be swapped.


That's as far as I got.
Yes, it looks a bit warped right now, but as soon as I glued the spacers in position, the sights will align properly.
Cheers

Klaus